Writing an image compression app (for Ghost) with NodeJS, imagemin & pngquant (Part I)
Introduction into writing an image compression app with NodeJS, imagemin & pngquant.
With my new blog, I quickly ran into the issue of very, very big files, I mean look at this:
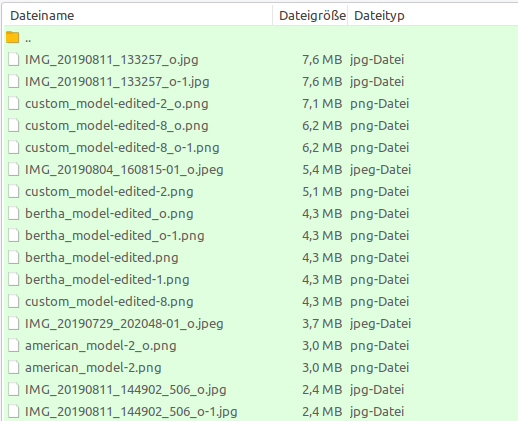
Those images are almost exclusively from one (upcoming) blog post. So I have to reduce the size of the images, otherwise I will squeeze all your data volume out once you read the article. :-D
I have done image-compression in the past with my project fotohaecker (link), so I know exactly what to do:
- Scan all the photo files (no matter if png or jpeg)
- Resize them to 1080p (1920x1080px) maximum
- Re-compress them with imagemin(-mozjpeg) and pngquant
- (optional) Backup the original photos to a backup location
I would then run the script on my server, it would resize and compress my images and your data is saved. Yay!
Prerequisites
- I'm using Ubuntu (Linux), but you can use MacOS or Windows aswell :)
- NodeJS, of course.
- imagemin, imagemin-mozjpeg, and pngquant (later on)
Preperation & Installing the dependencies
- Create the directory of our project:
mkdir ghost-compression && cd ghost-compression
We create the subdirectory "ghost compression" in our current folder, and then move into it.
- Initialize the package.json
npm init
This is used to organize our project, just enter any information you like here. :-)
- Install the first dependencies
npm install imagemin imagemin-mozjpeg pngquant
This installs the three mentioned dependencies into our project and requires them as a dependency in our package.json
Starting to code
Alright, now to the fun part: coding! :-D
The App (barebones)
We create a run.js just like this:
"use strict";

// define controller to keep run.js clean
const controller = require("./src/cli-controller.js");

// function to handle user input, it needs 1-2 parameters to work
const handleCliInput = (arg1, arg2) => {
  controller.helloWorld(arg1);
}

handleCliInput(process.argv[2], process.argv[3]);
Explanation:
handleCliInputredirects the request to the controller (covered below)process.argvis an array that contains the userinput after the run.js
The Controller (barebones)
Don't try to run the app yet, it wont work. We need a cli-controller.js to handle all the hard work and keep our app.js clean, so create a new subfolder src and in there, a cli-controller.js:
"use strict";

// define the function as a module, so we can import it in the run.js
module.exports.helloWorld = (arg) => {
  console.log(`You entered: ${arg}`);
}
Explanation:
helloWorldgets exported to themodule.exportsobject, so we can import it in the run.js. It just logs the argument, you give to it.
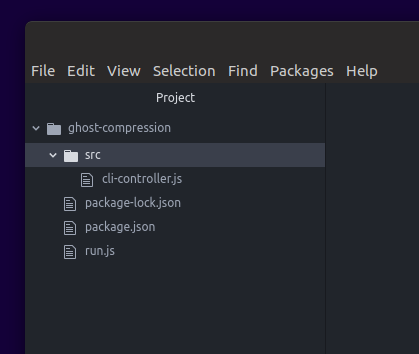
Verifying the folder structure
Just to make sure we did everything right, verify your folder structure:
Testing the first result yay!
So, we got a barebones version of our tool running now. Great! Try it out with:node run.js %your-message%

So, what now?
Today, we've learned how to create a tiny NodeJS starter, to get image compression running with ghost. Once it's finished, you can use it of course to compress anything that's jpg/png.
If you want to clone the project, you can: https://github.com/fschoenfeldt/ghost-compression
Thanks for checking out the start of my guide series for writing a (ghost) image compression app with NodeJS. If you have any questions, feel free to contact me via https://fschoenfeldt.de - Part II is coming, very soon! x
Cover-Image by Tomas Sobek on Unsplash